Fudgy Peanut Butter Brownies
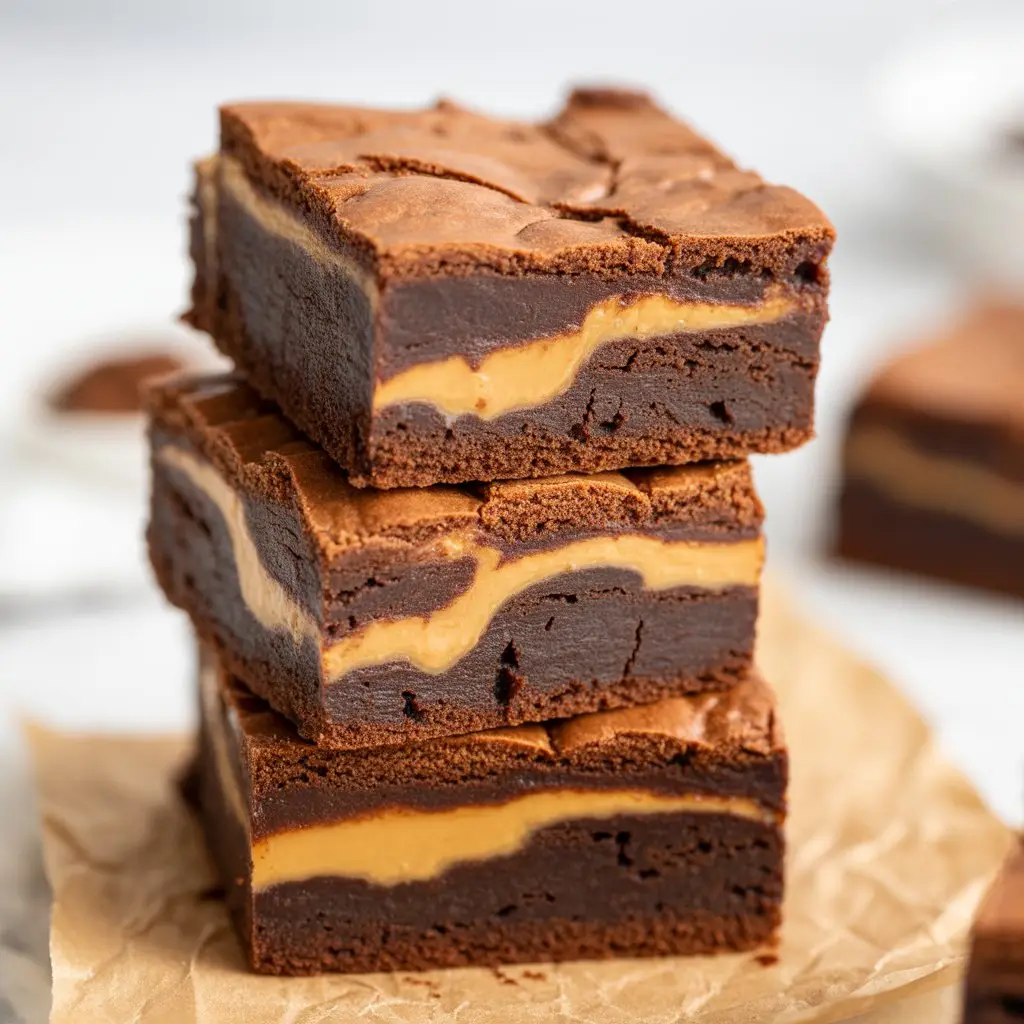
Look, some things are just non-negotiable. And for me, the combination of chocolate and peanut butter is one of them. It’s the king of all dessert duos. No contest.
And when you swirl that combo into a dark, ridiculously dense brownie? It’s game over.
This isn’t some fluffy, cakey brownie that apologizes for being a brownie. Nope. This is the one you make when you need to solve a problem, win a friend, or just have a moment of pure, gooey bliss all to yourself. It’s a masterpiece you can bake in a single pan, and honestly, it’s way easier than it looks.
The Lineup: What You’ll Need
Get everything out on the counter first. It just makes life easier. Trust me.
For the Brownie Guts:
| Melted Unsalted Butter | 1 cup (2 sticks) |
| Granulated Sugar | 1 ¼ cups |
| Light Brown Sugar | ¾ cup, packed |
| Large Eggs | 4 (room temp!) |
| Vanilla Extract | 1 tablespoon |
| All-Purpose Flour | 1 cup |
| Unsweetened Cocoa Powder | 1 cup (the good stuff) |
| Salt | ½ teaspoon |
| Semi-Sweet Chocolate Chips | 1 ½ cups |
For the Peanut Butter Swirl:
- 1 cup creamy peanut butter (think Jif/Skippy—they swirl better)
- ⅓ cup powdered sugar
- 2-3 tablespoons milk or cream
- ½ teaspoon vanilla extract
Your Kitchen Toolkit
Nothing too fancy required here, just the basics.
| Baking Pan | 9×13 inch |
| Paper | Parchment paper |
| Bowls | One large, one medium |
| Utensils | Whisk, spatula, knife |
| Cooling | Wire rack |
The Game Plan: Making the Brownies
Follow these steps, and you’ll get that perfect fudgy texture. It’s all in the technique, not magic.
Step 1: Crank your oven to 350°F (175°C). Line a 9×13 pan with parchment paper, leaving some hanging over the sides. This is your “brownie sling” for easy removal later. Give it a light grease.
Step 2: In a big bowl, whisk the melted butter and both sugars together. Really go for it for a minute until it’s all smooth.
Step 3: Add the room-temp eggs one by one, whisking after each. Then add the vanilla. Keep whisking until the batter looks glossy. This is what gives you that shiny, crackly top everyone loves.
Step 4: Dump the flour, cocoa powder, and salt right on top. Switch to a spatula and gently fold it all in until you *almost* can’t see any more flour. Seriously, don’t overmix here.
Step 5: Gently fold in the chocolate chips. Your brownie batter is officially done.
Step 6: In that other bowl, mix the peanut butter, powdered sugar, and vanilla. Add the milk a little at a time until the PB is creamy but still thick. You want it to dollop, not run.
Step 7: Pour about two-thirds of the brownie batter into the pan and spread it out. Drop spoonfuls of the peanut butter mixture all over the top.
Step 8: Plop the rest of the brownie batter in the gaps. Grab a knife and drag it through the batters a few times to make a marbled pattern. Don’t go crazy, or it’ll just turn brown.
Step 9: Bake for 30-35 minutes. A toothpick stuck in the center should come out with moist, fudgy crumbs. If it’s clean, you went too far.
Step 10: Let them cool. Completely. I know it’s pure torture, but this step is non-negotiable for that dense texture and for getting clean slices.
A Few Tricks I’ve Learned
Want to absolutely nail it? Here are some hard-won secrets.
- Stop Mixing! I said it before, but I’ll say it again. Overmixing after you add flour is the #1 killer of fudgy brownies. It makes them tough.
- Warm Eggs Matter. Cold eggs make the butter clump up. Warm them up in a bowl of warm water for a few minutes first. It makes a difference.
- Don’t Skimp on Chocolate. The flavor comes from the cocoa and chips. Use a good quality cocoa powder. It’s the star of the show, after all.
- When in Doubt, Pull Them Out. It’s better to slightly underbake than overbake. They’ll finish setting up as they cool down in the hot pan.
Feel Like Getting Creative?
This recipe is a great starting point. Go wild.
| Swap This | For This |
|---|---|
| Creamy PB | Almond butter, Nutella, Biscoff |
| Chocolate Chips | Mini peanut butter cups, chopped peanuts |
| The Top | Sprinkle with flaky sea salt before baking |
If You Have Leftovers (Somehow)
These brownies get even better after a day. It’s a scientific fact. Probably.
- On the Counter: Keep them in an airtight container for up to 4 days.
- In the Fridge: If you like them extra chewy and dense, the fridge is your friend.
- Freezing: Wrap them individually in plastic wrap and toss them in a freezer bag. They’ll be good for up to 3 months. Just thaw on the counter for a bit when you need a fix.
Quick Q&A
Q1. Why were my brownies cakey?
Ans: You probably overmixed the batter or left them in the oven too long. It happens to the best of us! Aim for moist crumbs on the toothpick next time.
Q2. Can I use natural peanut butter?
Ans: You can try, but it’s a bit runny and oily, so the swirls won’t be as clean. The processed stuff (Jif, etc.) just works better for this job.
Q3. My PB swirl just sank. What happened?
Ans: Your peanut butter mix might have been too thin. Make sure it’s thick enough to hold its shape when you dollop it on.
Q4. Can I use a smaller pan, like an 8×8?
Ans: Sure, but the brownies will be super thick. You’ll need to bake them way longer, maybe 45-55 minutes. Just keep an eye on them.
Alright, That’s a Wrap
So there you have it. The secret to brownies that will make people’s eyes roll back in their heads a little bit.
I really hope you make these. Don’t wait for a special occasion—a random Tuesday is special enough. If you try them, drop a comment. I’d love to hear how it went.

