Homemade Sweet Potato Dog Chews
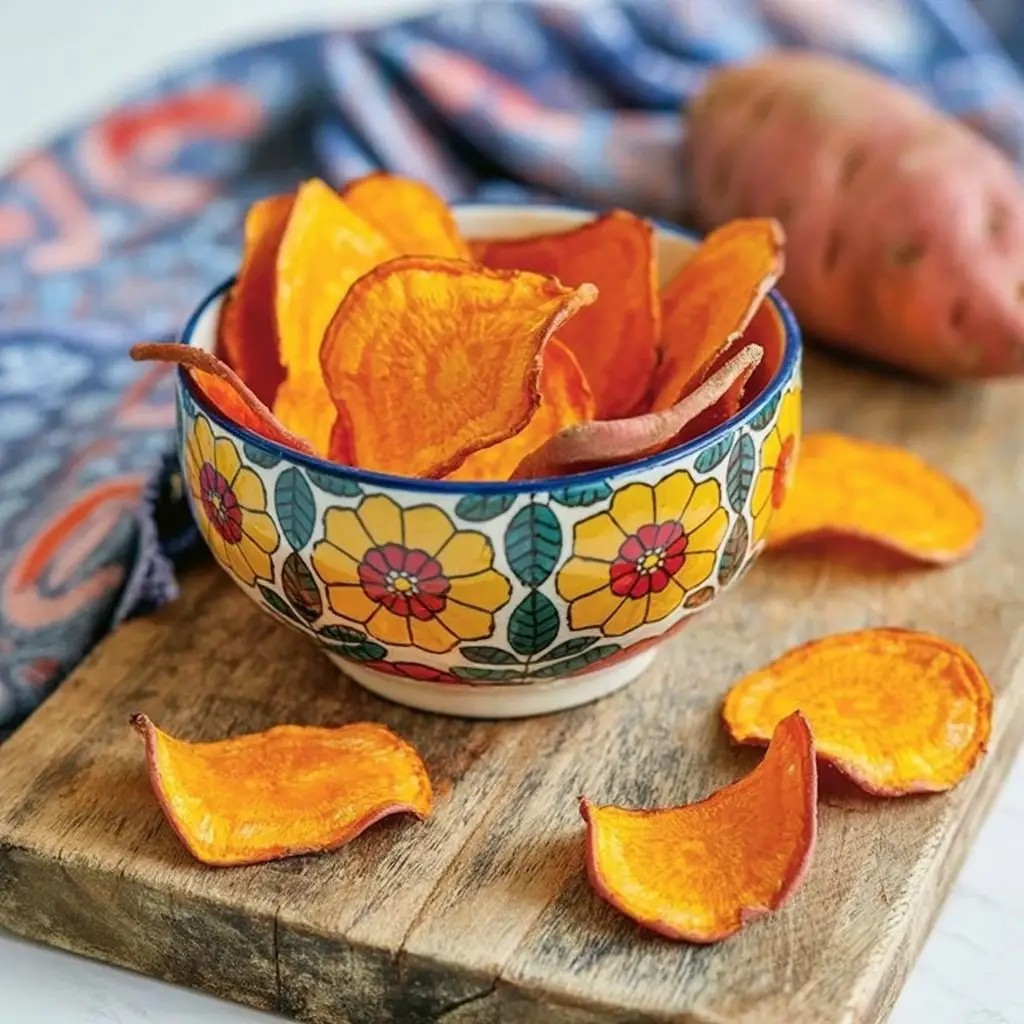
Ok, let’s be honest—there are few things more satisfying than giving your pup a treat that makes their tail spin like a fan blade. But what if that treat wasn’t full of junky ingredients or “beef flavor” that probably isn’t beef at all?
That’s where these homemade sweet potato dog chews come in.
They’re simple. Like… really simple.
They’re healthy. Just one ingredient—sweet potatoes.
And the best part? Dogs LOVE them.
And if you’ve ever paid $10 for a tiny bag of store-bought “natural” treats, your wallet’s probably nodding along too.
So today we’re making them ourselves. No preservatives. No additives. No guessing what “natural smoke flavor” means. Just good ol’ sweet potatoes and a little time.
Let’s get started.
Why Sweet Potatoes?
If you’ve never looked at a sweet potato and thought “dog treat,” you’re not alone. But here’s the deal:
| Benefit | Why It Matters |
|---|---|
| High in fiber | Keeps digestion healthy and your dog’s tummy happy |
| Rich in vitamins A & C | Supports eyes, skin, immune health |
| Natural sweetness | Dogs love the taste—without added sugar |
| Antioxidants | Fights inflammation and supports long-term health |
They’re soft enough to chew, tough enough to satisfy that need-to-gnaw instinct, and honestly? Your dog might like these more than bacon.
(I’m not saying they’ll give up bacon. Let’s not get crazy. But they’ll definitely love these.)
What You’ll Need
Ingredients
- 1 to 2 large sweet potatoes (look for ones that are firm and not sprouting)
Yup, that’s it. One ingredient. Done.
Tools
Let’s keep it low-fuss. Here’s what’ll make this whole thing easier:
- A sharp knife or mandoline (for slicing evenly)
- Cutting board
- Oven or food dehydrator
- Baking sheet
- Parchment paper (optional but makes cleanup WAY easier)
- Wire rack (optional, but helps with airflow)
Ultimate Pet Care Bundle
Everything You Need for a Happy, Healthy Pet
How to Make Sweet Potato Dog Chews (Step-by-Step)
Here’s where the magic happens. And spoiler alert: it’s barely even magic. This is one of those “wait, that’s all?” kind of recipes.
1. Preheat the oven
Set it to the lowest setting your oven will allow. For most people, that’s 200–250°F. If your oven has a dehydrator setting, even better.
2. Wash & dry the sweet potatoes
No need to peel unless you want to. The skin has great fiber and most dogs don’t mind it.
3. Slice evenly
Cut into ¼ inch thick slices—lengthwise if you want longer chews, crosswise if you want little coin shapes. Try to make them the same thickness so they cook evenly. Thinner slices = crispier. Thicker = chewier.
4. Optional: Blanching for texture
Want a softer chew that stays chewy longer? Boil the slices for 3–5 minutes, then plunge them into an ice bath. This helps preserve that vibrant orange color too.
5. Arrange on baking sheet
Use parchment if you want easy cleanup. Make sure the slices don’t overlap.
6. Bake low and slow
Pop into the oven for 2½ to 3 hours. Flip halfway through. You’re looking for dry on the outside but slightly flexible in the center.
7. Cool completely
Once they come out, let them cool fully. They’ll firm up a little more as they sit.
Pro Tips for First-Timers
| Tip | Why It Matters |
|---|---|
| Use firm, fresh sweet potatoes | Softer ones are harder to slice and won’t dehydrate as evenly |
| Mandoline = MVP | Helps keep slices uniform, which avoids under or overbaking |
| Don’t overcrowd the tray | Airflow is key to drying them out properly |
| Flip at least once | Helps them dry out evenly and avoids soggy spots |
| Store only when cool | Trapping warm moisture = mold city. Let them cool fully before storing |
Substitutions and Variations
You can absolutely get creative with these. Here’s how:
- Add cinnamon
Just a light sprinkle before baking adds a warm, sweet smell dogs love. It’s safe in small amounts. - Try pumpkin or carrot slices
They don’t dry the same, but they’re also healthy and dog-safe. Keep thickness consistent. - Air fryer?
Totally works. Use the lowest temp, and check every 30 minutes. Flip occasionally. - Dehydrator?
If you have one, go for it. Set to 130–135°F and let them run for 6–8 hours.
Make-Ahead and Storage Tips
Good news: these store like champs.
| Storage Method | How Long It Lasts |
|---|---|
| Room temperature (sealed container) | Up to 1 week |
| Refrigerator | 2–3 weeks |
| Freezer | Up to 3 months |
Want to make a big batch? Go ahead and freeze half. Just take a few out at a time and let them thaw at room temp before giving to your pup.
What About Nutrition?
Here’s a rough breakdown (per slice, depending on size):
| Nutrient | Approximate Amount |
|---|---|
| Calories | 10–15 kcal |
| Fiber | 1–2 g |
| Carbs | 4–5 g |
| Fat | 0 g |
| Protein | 0.5 g |
| Vitamin A | Off the charts (in a good way) |
These are great if you’re trying to reduce your pup’s treat calories without cutting back on treat joy.
What to Do with Leftovers
Honestly, these rarely last long enough to become leftovers.
But if they do:
- Store in an airtight container in the fridge
- Freeze in small batches for future snack time
- If they go soft, re-bake for 10–15 minutes to bring back some chew
Frequently Asked Questions
Can puppies have these?
Yup! Just make sure the size and texture is right for their little teeth. Always supervise the first time.
Can I use regular potatoes instead?
Not recommended. White potatoes aren’t toxic, but sweet potatoes are far healthier and digest easier for most dogs.
How many can I give at once?
Moderation, always. One or two per day is fine for most dogs. If your dog is tiny, maybe just a half.
Is the peel safe?
Totally. Just wash thoroughly. If your dog has a sensitive stomach, try peeling them for a gentler snack.
How can I make them crispier?
Slice thinner. Or bake a little longer. But if they get too crisp, they can lose that chewy texture some dogs love.
Try It With These
Ok, so this is clearly a dog recipe. But if you’re already in the kitchen, here’s a few things you could prep for the humans in the house:
- Apple slices with cinnamon
- Roasted chickpeas
- A cozy mug of broth (I know you saw that one coming)
- A quick smoothie with chia or flax (because why not?)
Bonus: Your dog gets a treat. You get a snack. Everyone wins.
Wrap Up
So there you go. A super simple, healthy, and seriously tail-wag-worthy treat that you can feel good about giving your dog.
No preservatives. No mystery ingredients. Just whole food goodness made right in your kitchen.
If you make this recipe, drop a comment and let me know how it went—or better yet, what your dog thought. Got a creative twist or a picky eater tip? I’d love to hear that too.
Here’s to happy tummies and wagging tails.
Let me know what you want next!

